
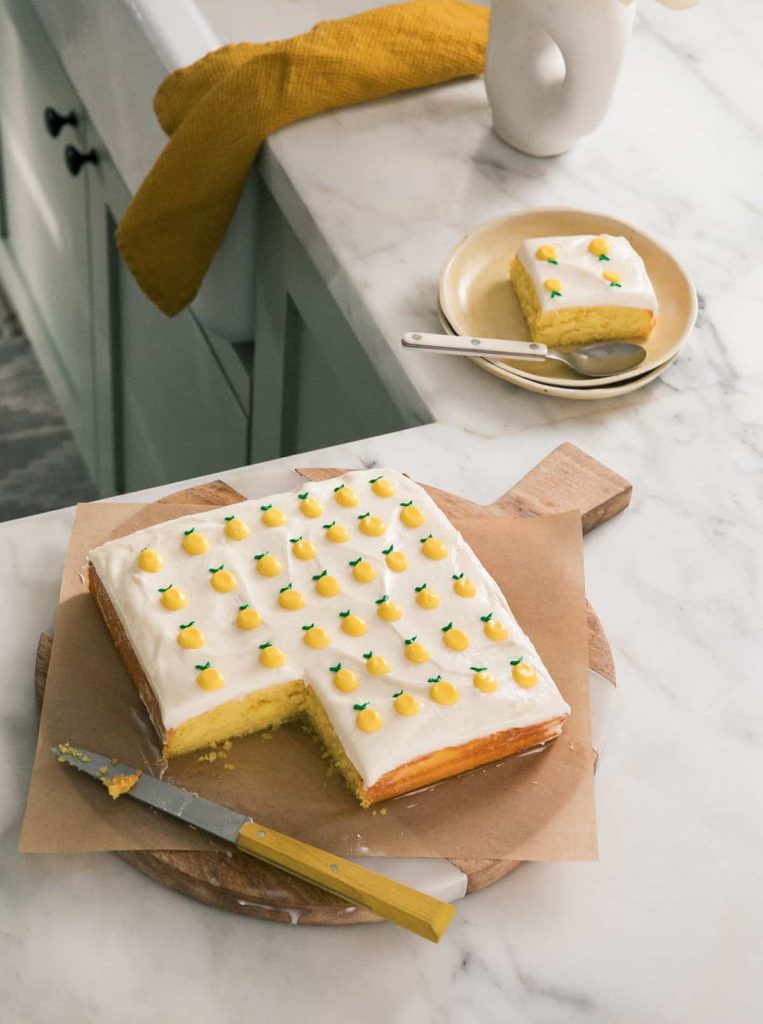
This Lemon Cake is soft, super moist, and bursting with bold lemon flavor. It’s bright and cheerful—like sunshine in cake form. I love baking it as a mini sheet cake because it’s quick to put together and so simple to decorate. Serve it after a cozy dinner of cherry tomato pasta and a Caesar salad for the perfect sweet finish.
If you’re anything like me, you might’ve grown up with a mom who wasn’t big on baking—too many precise measurements and steps. Box mixes were her go-to, and honestly, I loved every single one. Lemon cake was always at the top of my list.
So I created a lemon twist on my mini sheet cake series. You might already know and love my Mini Carrot Cake with Brown Butter Cream Cheese Frosting or my Mini Strawberry Cake—both reader favorites.

Lemon Cake
Ingredients
Equipment
Method
- To Make the Mini Sheet Cake:
- Preheat oven to 350F. Grease and line a 8×8-inch baking pan. (See below in “NOTES” section for other baking pan alternatives).
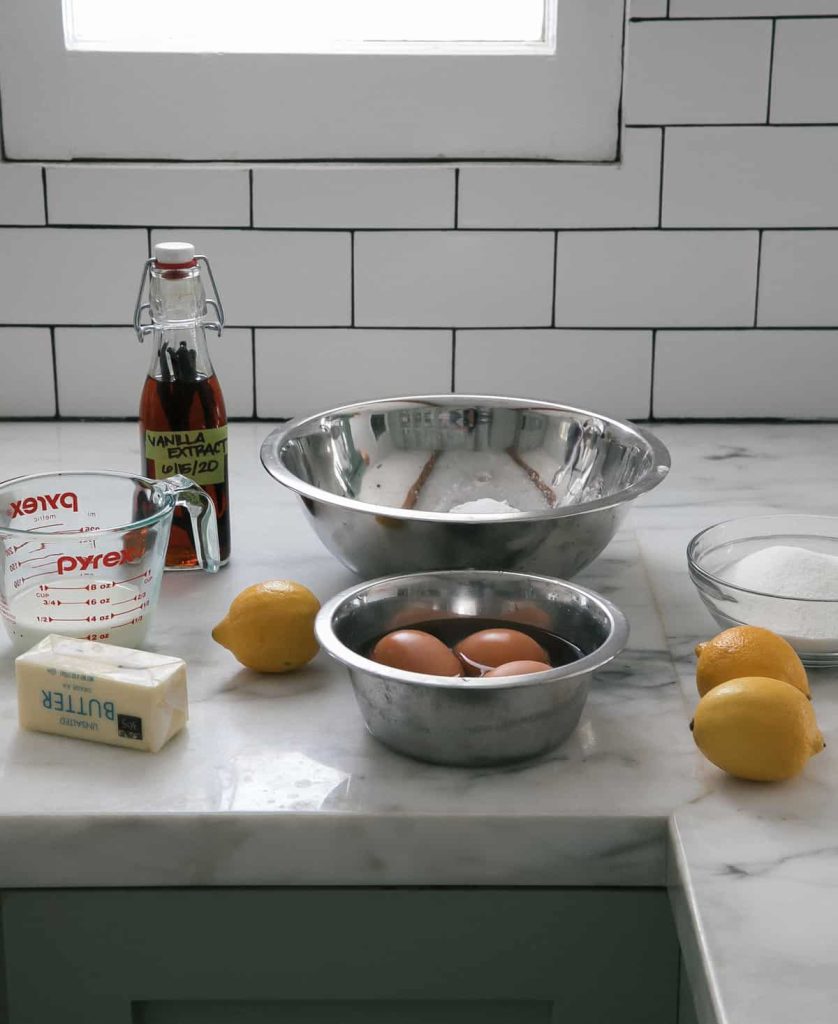
- In a medium bowl, whisk together the flour, baking powder and salt. Set aside.
- In the bowl of a stand-up mixer with the paddle attachment (alternatively you can do this in a large bowl with an electric mixer), add the sugar and lemon zest. Beat the two together. This will release all of the fragrant oils in the lemon zest and infuse them in the sugar. We want this, we need this.
- Add the butter and vanilla extract; beat until light and fluffy, about 2 to 3 minutes. If you want the cake to be yellow in color, add 2-3 drops of food coloring gel. This is of course optional.
- In a measuring cup, pour in the milk, egg whites, and add the strained lemon juice.
- Turn the mixer to low speed and, alternating between the dry ingredients and the liquid ingredients, add them to the butter/sugar mixture, until the batter is relatively smooth.
- Pour the batter into the prepared baking pan and smooth it out until it reaches the sides. Transfer to the oven to bake for 25 to 32 minutes, until a skewer inserted into the center comes out clean.
- Allow the cake to cool in the pan for about 10 minutes and then invert onto a cooling rack and cool to room temperature. It’ll probably take a good hour.
- To Make the Vanilla Cream Cheese Frosting:
- In the bowl of a stand-up mixer with the paddle attachment (or a medium bowl using an electric hand mixer), add the cream cheese and beat it until smooth. I like to do this or else the cream cheese frosting will have little clumps of cream cheese. Next, add the butter and beat it until smooth, about 15 seconds.
- Add the powdered sugar, salt, vanilla and heavy cream. Beat for a full 2 minutes to ensure fluffy, delicious frosting.
- To Make the Lemons for Decoration:
- To two small bowls, add about 1/4 cup of frosting to each. You can eyeball this. One will be our lemons (yellow) and another will be our stems (green). Add a drop or two of yellow food coloring to one frosting bowl. And add a drop or two of green food coloring gel to the second frosting bowl. Mix until smooth. Transfer the yellow frosting to a piping bag fitted with a #3 round piping tip.
- Transfer the yellow frosting to a piping bag fitted with a #1 round piping tip.
- To Decorate the Cake:
- Add the remaining frosting to the top of the cake and smooth it out into an even layer. Make it cute with some swoops. I like to clean the up the edges by using an offset spatula.
- If you didn’t do the lemons above, no biggie. Top it with some sprinkles OR leave it as is. It’s cute.
- To add the lemons, pipe on rounds of frosting; they’ll end up looking like lemons once we add the tops. Add as many as you like. Make them any size you like, too. Dip your finger in a bit of water and tap the tops of the lemons to make them appear smoother.
- Pipe on a small “V” shape at the top of each of the lemons. This will make it appear like they have a stem.
- To Store Cake:
- I keep this cake at room temperature on my counter. I don’t own a glass cake cover so I use a colander. This cake is delicious for about 2 to 3 days. If my way leaves you unsettled, you can always place the cake back into the 8×8-inch baking dish and cover it with plastic wrap. You can also place them in containers with lids and just store them at room temp.
Notes
The cake in the photos was made with about 5–6 drops of gel food coloring. Since gel is thicker and more concentrated, a little goes a long way. If you’re using regular liquid food coloring, start with 3–4 drops. The color won’t be quite as vibrant, but it won’t affect the texture. I’ve also tested it with just 3–4 drops of gel and it gave a soft yellow tint—so feel free to use less if you prefer a more natural look. Make Ahead:
You can bake the cake a day in advance. Let it cool completely, then wrap it tightly in plastic wrap. Decorate it the next day when you’re ready to serve.